Friday, June 27, 2014

What makes Super Hexagon good?

I hate Flappy Bird.
My friend loves it. He still plays it when he's bored.

He told me about Super Hexagon, and I thought it must be similar to Flappy Bird because "you die too often". When I told my friend that people generally hate games where they die too fast, my friend said "Dying too fast doesn't mean the game is not fun."

After I tried playing Super Hexagon, I understand why he said that.

But Super Hexagon is very very different from Flappy Bird. I don't hate Super Hexagon.
And while trying to identify the reasons for not hating the game, I  realized the good things about the design of that game, Super Hexagon.

After I played the game, I tried to find online articles that might explain how the game is fun from the design aspect or anything, but most of the articles don't give me much information. But most of them agree on one thing.

Super Hexagon is fun because it's hypnotic.
Eventually you'll be in a state of trance and you don't even think when you're playing. You will move your finger sub-consciously, as if you're dreaming. This is actually quite therapeutic.

Super Hexagon is fun because it allows steep learning curve, and it makes player feel good about it.

But other than those things, I want to discuss in more details about the components that the game has, that result in those fun factors. I tried several other Super Hexagon rip-offs (because they're free) and most of them suck big time. I tried to identify why.

Super hexagon is hypnotic because:
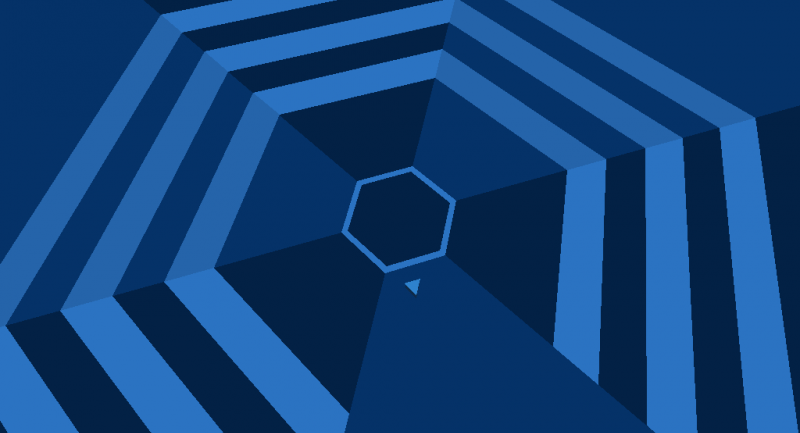
1. The area is divided into six, and it's rotating, almost as if it's trying to hypnotize you.


Most of the rip-offs get this right. To make a game like Super Hexagon, you need to hypnotize people. How do you do that? You try to make that hypnotizing gesture right in front of the player. Of course, not everybody understands that.

For example, this game is called Spiral Pulse. It has the same mechanic.


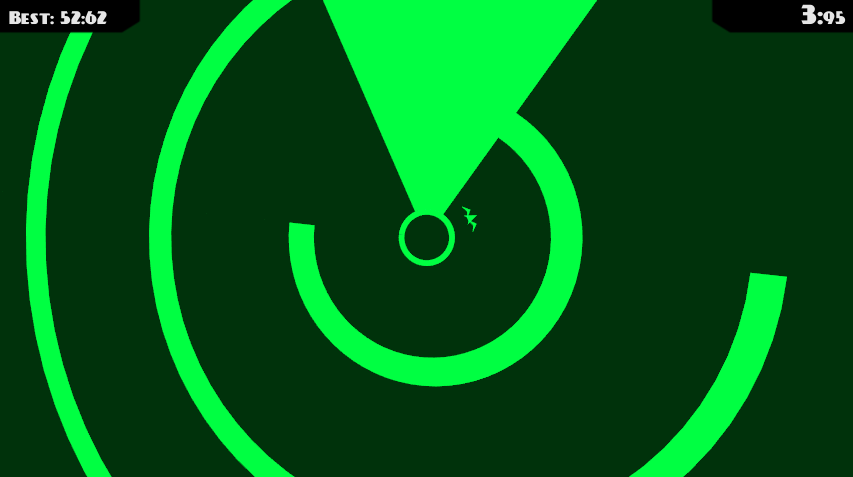
The only thing that is changing is only the colour. It fails its attempt to be hypnotizing to the player.

Failed.


 2. Not only the background that is of different shades. Even the hexagon itself is in different shades of colour.
This, along with the hexagon pulsing, gives an even more hypnotizing effect to the player. However, none of the rip-offs I found realized this.
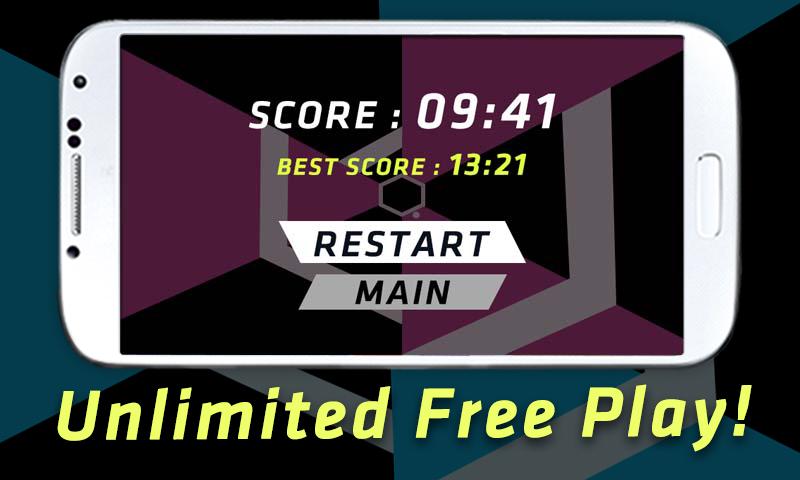
3. Instant restart
When you die, you just need to tap to restart the stage. This results in continuous state of trance. When you have freed your mind and it became blank, the idea of using one tap to continue being in that state is brilliant. Sometimes you don't even feel like you died. It feels like it's just part of the game. I would even tend to tap to restart instead of stop playing.

Compared to Flappy Bird, you need to start flying for a few times before you encounter the first pipe. After you die, you still need to tap a few times before you see a pipe. I find that few taps quite disruptive (but it's not like Flappy Bird gives me hypnotic feeling or something)

Most of the games similar to Super Hexagon also understand this. Most of them only need one tap for you to restart the game. However, it's very important to take note on how you tap.

Having a "restart" button at the center is very annoying, because you're playing the game with your thumbs. Sometimes the thumb is not long enough to reach the center of the phone just to restart the thing.

Super Hexagon, instead, implements the "tap anywhere to restart" to make it easy for the player to just play the game. They don't even need to think.


4. Trance music
The music in Super Hexagon is well-thought. Although it's not a rhythm game and supposedly the music is not really related to the speed of the hexagon, I do believe they have a relation. The hexagon is moving in rhythm with the music, and the electronic music further helps you to immerse in the game, to stop thinking and enter that trance state.


Wednesday, May 14, 2014

Problem #5: Unreliable tilemap collision

I programmed my NPC to move on its own, but due to the tilemap collision being unreliable, sometimes the NPC just can't move the way I intended it to.

Sometimes it can, sometimes it can't.

I can't have a game that can only work by chance, so I decided not to use the tilemap at all.
I replaced the tilemap with sprites.
But the tilemap is still kinda helpful with the positioning of the object sprites. Like for example, if Tiled is telling me the tile is at (17, 32), that means the position I need to code is (17*32, 32*32) because one tile in my map is 32x32 pixel large.

This kinda make the replacing quite fast. But the code becomes quite bulky due to the number of objects in the game.

Saturday, May 10, 2014

Problem #4: Sprites fall through the tilemap

Another problem that I face after creating the tilemap is that, although I intend to use tilemaps for platforms, sometimes the character would fall through the platform, or just go through it.

(And actually only after I get this problem I started thinking that it might be good to make a log of the development for future reference)

After thorough googling, I find the solution from this thread:
http://www.html5gamedevs.com/topic/4929-20-arcaded-tile-collision-issue/

This line of code in function update() do the magic:
this.game.physics.arcade.TILE_BIAS = 40;

The number 40 also did the magic for me, so I didn't change the value. But if you find your character still going through the tiles, just increase the value.

Friday, May 9, 2014

Problem #3: Making a tilemap

Oh hell, it took me some time to really understand how to make a tilemap.

1. Firstly, you have to have a tilemap editor.
In this case, I chose the most popular tilemap editor, Tiled. The reason is mostly because when I tried to google things related to tilemap, most people refer to Tiled as the editor they're using. So I guess it will be easier for me to ask around when I have any problem.

2. After making new tilemap, go to Map - New Tileset, and choose the tilemap texture that you have. If you don't have any, you can choose one given in Phaser first tutorial.

3. Take note of the name of your layer:


In the picture above, the name of the layer is "Tile Layer 1". This is the name that you will have to put in your code later.

4. In this case, I only use 1 tile, which is the first green tile (among many other green tiles). If you right-click on the tile, you can see the properties.


Select Tile Properties, and you can give it a property by double-clicking on the name and the value.


5. Save your map as .JSON file. If you open the file in your text editor, you will see that there's a number on the tile that you gave properties.


In the case above, I gave another property of "Test2" to another tile. The number above the property is the Tile ID. So my first tile with the property "Test" has Tile ID of 185, and "Test2" has Tile ID of 235. Knowing your tile ID is very important to set collision. I find giving properties to each of your tiles quite tedious. If anybody knows the easier way to see the tile ID, please tell me.

(To be honest I don't even think you need to do all those steps. It's just that I don't know how to see the tile ID, although I can still work around it)
(Since it's my first time working with tilemap, it took me hours to understand all of the above)

6. Now we go back to coding!
In the function preload(), load your map and tiles:
game.load.tilemap('map', 'assets/test.json', null, Phaser.Tilemap.TILED_JSON);
game.load.image('tiles', 'assets/platform.png');

Don't forget to declare your map and layer.

In the function create(), add:
map = game.add.tilemap('map');
map.addTilesetImage('testmap', 'tiles');
map.setCollisionBetween(0, 10);
 

layer = map.createLayer('Tile Layer 1');
layer.resizeWorld();

The setCollisionBetween() means the tiles with the ID from 0 to 10 will collide with our sprites. This is easier, since I can just put setCollisionBetween(0, 500) and thus even if I don't know the tile ID, chances are it will be between 0 and 500.
In the function map.createLayer(), you have to put the name of the layer in your .JSON file, which in my case is "Tile Layer 1".

And voila, you're done. It's so easy it makes me wonder why I spent hours trying to get it right.

Now that I'm done working with the game mechanic, I can start making the sprites :3


Thursday, May 8, 2014

Problem #2: Centering the game and make camera follow the player

I want my game to be on the center of the screen, so I asked my best friend (Google) on how to do that. Being able to find solutions through Google is a good skill to have.

Basically, I stumbled upon this thread: http://www.html5gamedevs.com/topic/1609-centering-canvas/

But it doesn't work. Basically after poking around in other threads and spending around an hour to do so, I realized that the code is wrong. You're supposed to put this code inside the create() function:

this.game.scale.pageAlignHorizontally = true;
this.game.scale.pageAlignVertically = true;
this.game.scale.refresh();

and voila, it's in the center.


(But it's not in the center when I put it in the web. Dammit, some more problems to solve.)

The next one is I want the camera to follow the player. Now I'm not sure why I seemed to be having a hard time yesterday, but actually it's just putting this code inside the function create():
player.anchor.setTo(0.5, 0.5);
game.camera.follow(player, Phaser.Camera.FOLLOW_PLATFORMER);

And you don't actually need the first line. See how easy it is to do stuff in Phaser? :D

Problem #1

Following the "Getting Started" to install Phaser, I find some problems, especially when installing the local server.

I used WAMPServer to make a local server, but when you do that, you have to make sure that you don't have Apache or MySQL (not sure about this) installed already. In my case, apparently I installed Apache 2.2 some time ago, and WAMPServer installed Apache 2.4 for me, and both of them collided. After uninstalling all Apache and installing WAMPServer again, everything works just like in the Getting Started tutorial.

If you use WAMPServer, make sure that your tray icon turns green. Green means everything started nicely. If it's orange or red in colour, that means there's a problem.

To download the repository of Phaser, I use SmartGIT. It's quite easy to do.
In the website, copy the link for the clone (it's basically the same link, just add .git at the end):


In SmartGIT, just choose Project -> Clone (or just press Ctrl + Alt + O)
Copy the link in the box for "Repository Link", click next, and when they ask you to specify the path, it's basically the place where you want to copy the whole repository.

If you don't have any problem, you should be able to go through Part 6 of Getting Started without a hitch.

In my case, since my server couldn't work, although when I go to localhost they tell me "It works!" but when I go to directory under localhost, eg "localhost/test" (after I created a folder called "test" in the webroot), they show me 404 not found.

It took me good two hours just to find out what the problem was u_u

Putting stuff here because Tumblr is not working on my browser

Recently I found this HTML5 game framework called Phaser, and I think it's pretty awesome for newbies!

Since I'm not very familiar with JavaScript (or programming in general), I find Phaser quite user-friendly. Moreover, there are many examples for you to get used to the functions there, and the support in the forum is superb!

Just by following the first tutorial you can make something like this:

http://necha.syuriken.jp/phasertest

So I decided to make a simple game on this June holiday!